

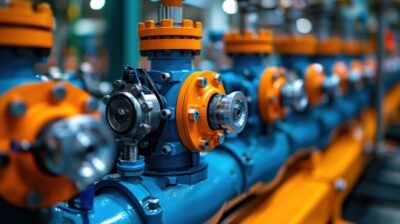
Diaphragm pumps are known for their versatility and ability to handle various fluids, from viscous liquids to slurries. However, these pumps rely on proper priming to function effectively. Without a liquid seal, the pump struggles to create suction, reducing flow, cavitation, and potential damage to the diaphragms and other components.
That said, this article will walk you through the essential steps of priming a diaphragm pump, ensuring peak performance and preventing costly repairs.
Step 1: Inspect the Pump and Connections
Before starting the priming process, it is essential to inspect the pump and all associated connections thoroughly. Check the suction hose or pipeline for any visible leaks, cracks, or loose fittings, as even small air leaks can prevent the pump from achieving proper priming. Additionally, ensure that all clamps, seals, and gaskets are intact and secured to avoid air entering the system.
If the pump is being used after a period of inactivity, check for any blockages or debris in the suction line that could obstruct fluid flow. Pumps designed with reliable sealing and high-quality components, such as those from KNF, can help minimize the risk of air leaks and ensure more efficient operation. Performing this initial check will help prevent common priming issues and keep the pump running smoothly.
Step 2: Ensure the Pump is Properly Positioned
The location and positioning of the pump play a significant role in its ability to prime effectively. Ideally, the pump should be placed below the liquid source, allowing gravity to assist in filling the suction line and creating the necessary vacuum. If the pump is located above the fluid level, additional steps, such as manual priming, may be required to initiate suction.
Furthermore, ensure that the suction hose is not excessively long or routed with sharp bends, as this can create resistance and make it harder for the pump to draw fluid. Keeping the suction line as straight and short as possible minimizes the effort required for priming and enhances overall efficiency.
Step 3: Open the Suction Line and Discharge Valve
The suction line must be free of obstructions for the pump to prime effectively, and the inlet valve should be fully open. Closing or restricting the suction valve can create vacuum pressure issues, making it difficult for the pump to draw in liquid.
In some cases, if the pump is having trouble priming, it may help to slightly open the discharge valve to allow trapped air to escape. If the pump is equipped with a priming valve, open it to facilitate the release of air pockets that may be preventing proper suction. Ensuring the suction and discharge pathways are open and unobstructed is key to achieving a successful prime.

Step 4: Manually Fill the Pump (If Required)
Some diaphragm pumps, especially those operating in dry conditions or when positioned above the fluid level, may struggle to prime independently. In such cases, manually filling the pump chamber with liquid can help initiate suction. This can be done by adding fluid directly into the pump housing or suction hose until the pump can naturally draw liquid.
This process, also known as ‘wet priming,’ helps create the necessary vacuum for fluid movement and eliminates air pockets that could hinder suction. For pumps designed to be self-priming, this step is usually unnecessary, but it can be beneficial in situations where the pump has lost prime or is dealing with a significant suction lift.
Step 5: Start the Pump at a Low Speed
Once the system is set up and all necessary preliminary steps have been taken, it is important to start the pump at a low speed or pressure setting. Running the pump at full speed immediately can lead to cavitation—an issue where air pockets form within the pump, reducing efficiency and potentially causing mechanical damage.
Allowing the pump to operate at a slow and steady rate initially helps it gradually build the necessary vacuum for suction. This measured approach also prevents unnecessary strain on the diaphragm and internal components, promoting smoother operation and increasing the pump’s lifespan.
Step 6: Monitor for Air and Flow Stabilization
As the pump begins to operate, closely observe the discharge line for signs of air bubbles. If air is being expelled through the discharge, this indicates that the priming process is underway. Continue monitoring until a consistent and uninterrupted flow of liquid is achieved, as this signifies that the pump has fully primed.
If the pump fails to maintain a steady flow or experiences interruptions, there may still be air pockets or leaks in the suction line that need to be addressed. Rechecking all connections and ensuring the suction hose is submerged correctly in the liquid source can help resolve persistent priming issues.
Step 7: Adjust Flow and Pressure for Optimal Performance
Once the pump has successfully primed and operated smoothly, gradually increase the flow rate or pressure to match the desired operating conditions. Avoid making abrupt adjustments, as sudden changes in pressure can disrupt the pump’s stability and introduce new air pockets.
Ensure that the pump is running without excessive vibration, noise, or pulsation. These symptoms could indicate underlying issues such as trapped air, cavitation, or mechanical misalignment. Properly tuning the pump settings improves efficiency and extends the service life of the diaphragm and other internal components.
Conclusion
This guide has helped clear up any confusion about priming your diaphragm pump. If you’ve been struggling with weak flow or inconsistent performance, try these priming steps. You might be surprised at how much of a difference it makes. And if you’re still having trouble, don’t hesitate to consult your pump’s manual or contact a qualified technician.