Garages deal with a lot—dirt, oil stains, and constant traffic from cars and people. But making your garage floor look new and tough doesn’t have to be hard. Epoxy coating is a great way to do it. Epoxy coating is a great solution.
In this guide, we’ll explain why epoxy flooring is a top choice for your garage, highlighting its durability and low-maintenance benefits. You’ll find all the details on costs and get some practical installation tips.
5 Benefits of Choosing Epoxy Coating for Your Garage Floor
1. It’s Easy to Clean and Take Care Of
We all have busy lives, and most of us don’t want to waste time scrubbing the garage floor. That’s why more people are choosing epoxy garage flooring. A quick sweep and an occasional mop are all it takes to keep your garage looking fresh and clean. No need for heavy-duty cleaning routines—epoxy flooring fits right into your schedule, saving you time and energy for the things that matter most.
2. Epoxy Flooring is Much Safer to Use
When your garage is a busy space, safety is very important. The good news is that epoxy flooring has slip-resistant options, making it a safer choice for everyone especially for those who have kids loves playing around. Plus, the glossy surface of epoxy flooring reflects light, helping to brighten up your garage, which is really helpful when you’re working on projects or doing family activities.
3. Cost-Effectiveness of Epoxy Flooring
Epoxy flooring isn’t just about looking good—it’s a smart investment for your wallet, too! With its long-lasting durability and low maintenance needs, you’ll save money in the long run. Instead of constantly repairing or replacing other types of floors, epoxy holds up for years, cutting down on future costs.
4. Easy Fixes That Last a Long Time
One great advantage of epoxy garage flooring is its easy maintenance. If you notice minor scuffs or damage, there’s no need to stress over complicated or pricey fixes. Epoxy’s seamless surface allows for quick touch-ups without tearing up large sections, saving you money and keeping your garage floor looking fresh for years.
5. Handles All Temperatures, Any Season
Epoxy garage floors can handle any season, no matter how extreme the weather gets. The surface remains tough and sturdy through hot summer days to freezing winters. You won’t have to worry about it cracking or wearing down due to temperature changes. With this kind of weather resistance, your epoxy floor will keep looking good and performing well all year round, making it a reliable and long-term solution for your garage.
How Much Does an Epoxy Garage Floor Cost?
A high-quality epoxy floor for a two-car garage usually costs between $4,000 and $5,500. This includes premium materials like solids, epoxy, and polyurethane. Labor typically ranges from $7 to $12.50 per square foot, while materials cost about $2 to $6.50 per square foot. Larger garages generally have a lower price per square foot, whereas smaller one-car garages tend to cost more.
Step-by-Step Guide to Installing Epoxy Flooring in Your Garage
Get the Garage Ready
Start by moving everything off the floor—shelves, tools, and anything else in the way. If you have low-hanging shelves, take those down too. Use painter’s tape to protect your walls, and if you like, paint a few inches up for a neat finish. Next, clean up any oil or grease stains using a degreaser and a brush. Rinse it, and you’re ready for the next step!
Etch the Concrete Surface
Time to roughen up the floor! Mix your acid etching solution with water in a watering can, then pour it evenly over the concrete. You’ll see it foam up—that’s how you know it’s working. Let it dry completely, then sweep and vacuum the floor to clear away any residue. Safety first—don’t forget your gloves, glasses, and respirator for this step!
Clean the Floor: Sweep, Vacuum, and Rinse
Now it’s time to get that floor spotless! Sweep away all the dirt and debris you can see. Then, use a wet-dry vacuum to thoroughly clean the entire floor, picking up anything you might have missed. Rinse the surface with water, and let the floor dry completely before moving to the next step.
Stir the Epoxy Mixture
Time to get that epoxy ready! Carefully open the epoxy and hardener cans, then blend them together, following the instructions closely. After mixing, let the mixture sit for about 30 minutes before the chemical reaction happens. If the bucket feels warm, don’t worry—it’s just part of the process. Once it’s ready, you’re all set to start applying!
Roll on the Base Coat
With your epoxy mixed, it’s time to apply the base coat. Start by pouring some of the epoxy into a paint tray. Use a paintbrush to cut carefully around the edges of the walls. Work in small sections, then switch to a roller for smooth, even coverage across the floor. Make sure to maintain a wet edge to avoid any uneven spots. Once the coat is on, give it 12-24 hours to fully dry before adding another layer.
Add Color Flakes to the Wet Surface
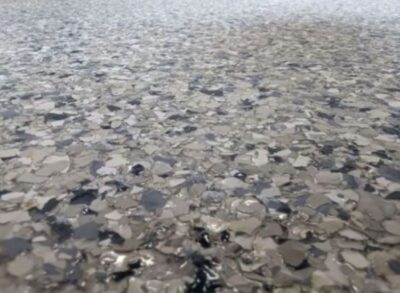
While the second coat is still fresh, it’s time to sprinkle on those color flakes and give your floor some serious style! Work section by section and gently toss the flakes from a loose hand for a smooth, even look. Don’t overdo it in one spot or skimp in others—aim for a balanced spread.
Mix and Roll on the Top Coat
For the final step, mix the top coat and hardener thoroughly, adding anti-skid material if needed. Stir it well, then give it one last mix just before applying. Start by cutting in around the edges, working in small 5×5-foot sections. Roll the top coat on, first in one direction, then switch to the opposite to avoid lap marks. Let it dry for 24 to 36 hours, and now you’re done!
Epoxy coating is one of the best ways to upgrade your garage floor. It’s durable and easy to clean and maintain. Now that you understand the benefits, costs, and installation steps, you’re set to make a smart decision for your garage.Whether you do it yourself or hire a pro like Blastek Concrete Designs, epoxy flooring will give your garage a lasting, clean look that can withstand daily wear. It’s a straightforward way to turn your garage into a space you’ll enjoy for years.
Feature Photo credit: Blastek Concrete Designs


