Asphalt paving is one of the most common surfacing materials for driveways, parking lots, and roads. Whether renovating an old driveway or starting a new construction project, asphalt paving is an affordable option utilized by homeowners and commercial properties nowadays. When installed correctly and properly maintained, asphalt can last for decades with little wear and tear.
However, taking shortcuts or overlooking vital steps during the installation and maintenance can lead to premature deterioration. Cutting corners or neglecting care can lead to premature wear and costly replacement work down the road.
This guide outlines seven essential steps property owners must follow to maximize the lifespan of their asphalt pavement investment, from preparing a stable base to routinely inspecting for issues and learning best practices for installation.
1. Prepare The Base
The most crucial factor in long-lasting asphalt is having a solid, well-prepared base on which the new pavement can rest. Ideally, this base will consist of compacted gravel or crushed stone tamped down firmly.
For new pavement, excavate the area to a depth of at least 6 inches and fill it with dense-graded aggregate like gravel in 4-inch lifts, compacting thoroughly between lifts.
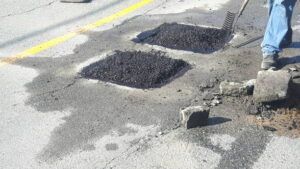
For repair patches, cut back the damaged asphalt in a square shape with straight edges. Then, excavate the base material underneath to a depth to a depth of 4-6 inches and compact fresh gravel in its place. A stable, level base that won’t settle or shift over time is critical for preventing cracks or potholes down the road.
2. Lay The Asphalt
Besides, once the base is ready, it’s time to install the asphalt. For small jobs like residential driveways, many homeowners rent a machine that mixes, lays and compacts the new blacktop in one pass. Commercial asphalt teams are also an option for small businesses, in areas where water is more prone to cause failures, creating the need for instance for asphalt paving portland.
Larger commercial jobs require separately delivered hot mix asphalt with large pavers or dump trucks.
Apply asphalt at a minimum depth of 2-3 inches for residential driveways, laying it over the prepared base in even lifts. Use a riding roller or vibrating plate compactor to firmly pack the new asphalt, avoiding
excessive rolling that can cause cracking. Don’t work the fresh pavement excessively on hot days; allow it to cool before sealing or marking. For every inch of asphalt you lay down, you must add an additional ¼ inch that will be compacted.
3. Add Sealant/Primer Coat
For maximum protection against water infiltration that can cause pavement deformities over time, apply a primer or sealant coating over the newly finished asphalt. A rubberized asphalt emulsion works well for this, sealing the pores in the blacktop. Use a squeegee or spray application and allow it to cure according to package directions before permitting vehicle traffic.
Usually, the sealcoating creates a protective barrier that prevents water from seeping into the pavement materials below. It also improves skid resistance on the asphalt surface for better traction. Regular resealing every 3-5 years shields the underlying asphalt from damage over its service life.
4. Complete Marking/Design
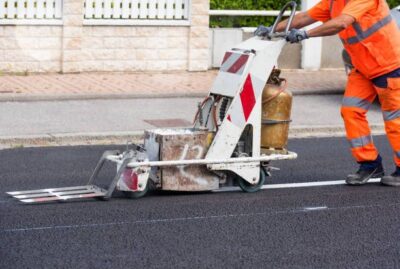
With the asphalt fully compacted and sealed, it’s time to add any necessary pavement markings, like driveway or parking lot lines. For residential work, paint or liquid asphalt make suitable options.
However, high-traffic commercial areas may require durable thermoplastic or preformed tape to hold up better over time. You can also enhance the look of a new asphalt surface by imprinting patterns, logos or decorative designs while it’s still fresh. Professional concrete stamping tools achieve realistic brick, stone or other aesthetic effects that become integral to the paving. Just allow the blacktop to be fully cured before permitting vehicle use.
5. Control Weeds
Likewise, no freshly laid asphalt is complete without controlling unwanted weeds. It only takes a small amount of seeds to grow a bumper weed crop in the seams and cracks of pavement over the summer if left unchecked. For best results, pre-treat the asphalt with a non-selective herbicide before and after installation to prevent weed growth.
Products containing glyphosate or other grass and broadleaf-killing ingredients systematically eliminate weed threats before they emerge. Reapply as needed every few months or as new weeds appear to maintain a pristine, vegetation-free asphalt surface area over the long run.
6. Inspect Regularly and Repair Promptly
Additionally Visual inspection of asphalt pavements should be part of routine home maintenance, checking for cracks, potholes, sinking or heaving areas at least a few times annually. Catching minor defects early allows for simple repairs versus deferred damages requiring major replacement work later.
Fill cracks or minor depressions with asphalt crack filler while they are still narrow. For larger issues affecting structural integrity, cut out the compromised section and replace it with fresh hot mix asphalt, fully compact it, and seal the patch. Taking care of maintenance needs promptly protects your initial paving investment.

7. Reseal Every Few Years
No matter how well an asphalt surface is installed and cared for, resealing is essential periodically to replenish its weathered protective seal against water infiltration. Depending on traffic and climate conditions, most residential driveways and paved areas will benefit from resealing every 3-5 years
Therefore, Power wash to remove dirt, debris and any loose particles before applying a new coat of asphalt sealant or emulsion with a squeegee. This rejuvenates the faded asphalt color while shielding the surface from damage by moisture below. Resealing extends pavement lifetime by preserving the underlying material structure decade after decade with minimal effort.
Conclusion
Proper installation combined with regular maintenance like inspections, prompt repairs, weed control and resealing every few years means asphalt can serve homeowners and businesses for 15-20 years or longer as a low-cost paving solution.
Following these key steps ensures maximum performance and longevity from any new or existing asphalt surface. With some care, your investment will continue serving its purpose for many driving seasons.


